Introduction
In this blog I am looking at Azure Arc-enabled data services and one of the main reasons to use them – SQL Managed Instances (MI). I am going to highlight why you might want to use SQL MI’s and am going to provide you with a guide of how to deploy them onto your Azure Stack HCI clusters.
Please note that there are a lot of pieces that need to be put together to get this working, and not everything can be covered in a single post. There are some excellent documents provided by Microsoft and I have endeavoured to collate the pertinent parts in this blog to give you a good starting point to deploy onto an Azure Stack HCI Cluster. The examples in this blog will be for Portal deployments, and command line tools are also available.
What are SQL Manged Instances?
A SQL Managed Instance (MI) enabled by Azure Arc is an Azure SQL data service that can be created on the infrastructure of your choice. In this blog we are focusing on Azure Stack HCI, although Azure Arc makes it possible to run Azure data services on-premises, at the edge, and in public clouds using Kubernetes and the infrastructure of your choice.
Why would I want to use SQL Managed Instances?
There are many benefits to running SQL MI’s on Azure Stack HCI in your own DC’s or remote locations. SQL Managed Instances have near 100% compatibility with the latest SQL Server database engine, and enables existing SQL Server customers to lift and shift their applications to Azure Arc data services with minimal application and database changes while maintaining data sovereignty. At the same time, SQL Managed Instances include built-in management capabilities that drastically reduce management overhead.
The main benefits come part of Azure Arc data services, and are summarised as per below:
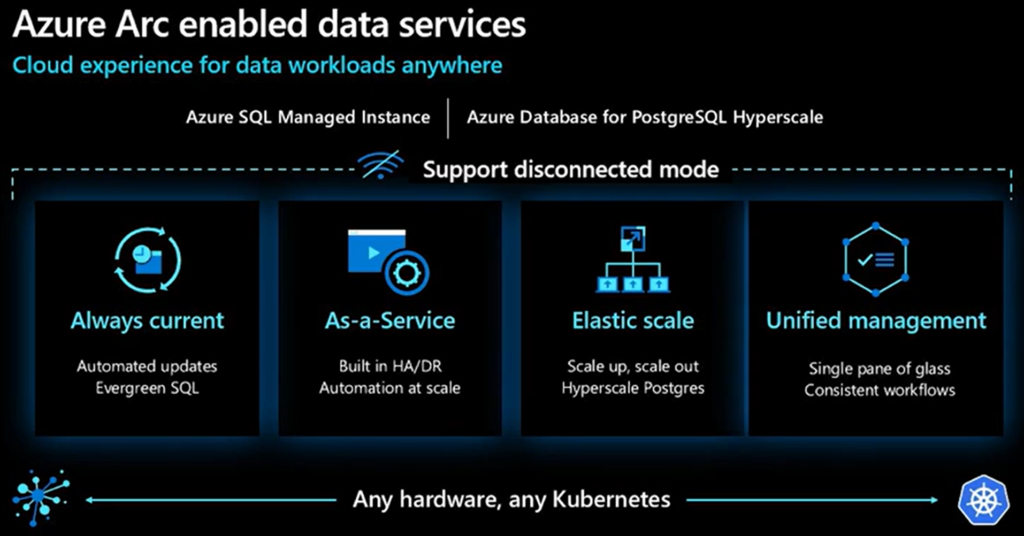
| Always current | Receive updates on a frequent basis including servicing patches and new features similar to the experience in Azure. Updates from the Microsoft Container Registry are provided to you and deployment cadences are set by you in accordance with your policies. Stay up to date while ensuring you maintain control. Because Azure Arc-enabled data services are a subscription service, you will no longer face end-of-support situations for your databases. |
| Elastic scale | Cloud-like elasticity on-premises enables you to scale databases up or down dynamically in much the same way as they do in Azure, based on the available capacity of your infrastructure. |
| Self-service provisioning | Thanks to Kubernetes-based orchestration, you can deploy a database in seconds using either GUI or CLI tools. |
| Unified management | Gain a unified view of all your data assets deployed with Azure Arc using familiar tools such as the Azure portal, Azure Data Studio, and the Azure CLI. View and manage a variety of databases across your environment and Azure, and also get logs and telemetry from Kubernetes APIs to analyze the underlying infrastructure capacity and health. Leverage Azure Monitor for comprehensive operational insights across your entire estate (in additional to localised log analytics and performance monitoring). |
| Disconnected scenario support | Run services locally in your infrastructure with or without a direct connection to Azure. Indirect scenarios require that you already have your own local Kubernetes cluster |
Differences in Management Capabilities
There are some differences running a local SQL MI service on Azure Stack HCI when compared to running it as a PaaS service in Azure, which are detailed below:
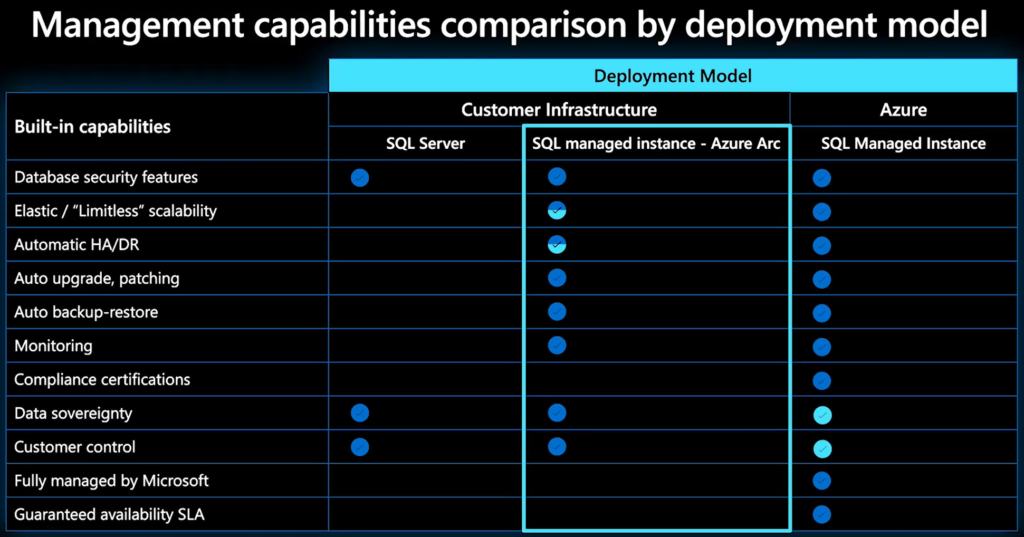
| Elastic / “Limitless” scalability | Limited by the infrastructure a the customers site |
| Automatic HA/DR | The underlying Hardware/K8s availability is the responsibility of the customer |
| Compliance certificates | Responsibility of the customer |
| Data sovereignty | Azure regions not available in all countries, customer can deploy to their own locations / DCs |
| Customer control | Predefined hardware options in Azure |
| Fully managed by Microsoft | Responsibility of the customer to support the solution (management features are provided) |
| Guaranteed availability SLA | Responsibility of the customer, not offered by Microsoft |
Connectivity Modes
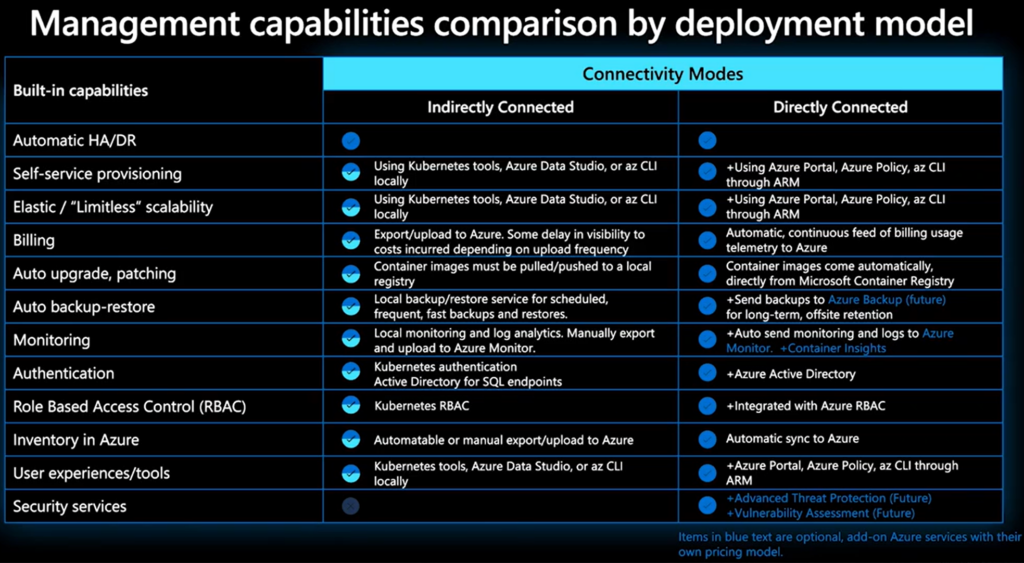
There are two main options for connectivity from your Azure Arc-enabled data services environment to Azure, and your choice will be based on business policy and government regulation requirements, or the availability of network connectivity to Azure. The connectivity modes are:
- Directly connected
- Indirectly connected
The connectivity mode provides you the flexibility to choose how much data is sent to Azure and how users interact with the Arc Data Controller. Depending on the connectivity mode that is chosen, some functionality of Azure Arc-enabled data services might or might not be available. To leverage Azure APIs then you will need to use connected mode and Microsoft Entra ID and Azure Role-Based Access Control can be used in the directly connected mode only because there’s a dependency on a continuous and direct connection to Azure to provide this functionality.
For Azure Stack HCI, Azure data services and SQL MI’s are deployed to Arc-enabled Aks clusters and so you will using Directly connected mode.
Deployment onto Azure Stack HCI
Prerequisites
Azure Arc-enabled SQL Managed Instance (MI) requires a working Kubernetes cluster has already been deployed and added to Azure Arc and has proper internet connectivity for Azure data services. Below is a list of resources required for SQL MI:
- AKS Cluster deployed to the Azure Stack HCI cluster
- Logical Network
- Load Balancer
- Data Controller resource
- Custom Location
- K8s Configuration template
- AD Connector resource
- Active Directory Organizational Unit
- Active Directory Service Account
- Primary DNS Name
- Secondary DNS Name
- Manually created DNS A Records for the DNS Names
- SQL Managed Instance
- Log Analytics Workspace for Logs and Metrics
Deploy an Aks Cluster
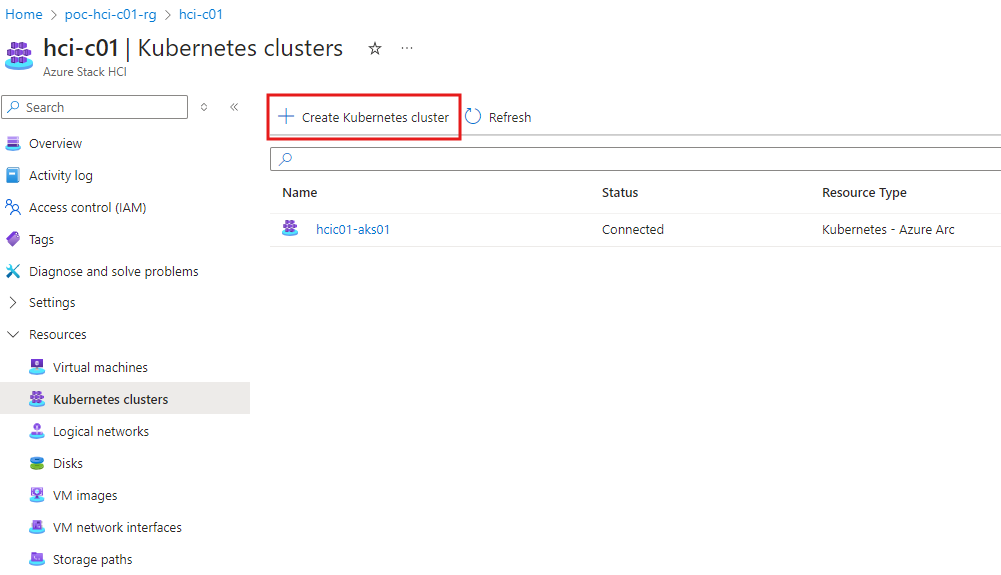
Before you can configure Arc Data Services and deploy a SQL MI, you need to deploy a dedicated Kubernetes cluster for the SQL services to run on. Deploying an Aks clustering is beyond the scope of this blog as we are concentrating on SQL MI, but you can easily deploy an Kubernetes cluster via Azure Arc on Azure Stack HCI:
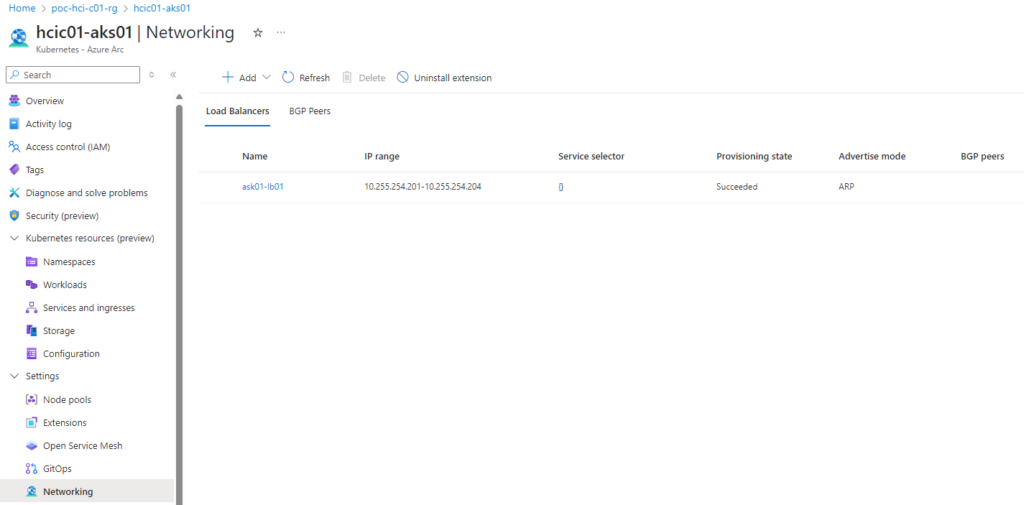
After the Aks cluster is deployed, create a Load Balancer with a minimum of 4 x IP Addresses:
Recommended Base Configuration
The below is a recommended base configuration for the Aks cluster, on experience. Azure arc data and SQL MI services where found to require a lot of resources and the most consistent and reliable experiences was with deploying the Aks VMs using the highest spec. Also, for resiliency, deploy at least 3 x Control Plane and 3 x Node Pools VMs:
- Install AKS clusters with 3 x Control Plane and 3 x Node Pool VMs
- Install AKS clusters with largest vCPU and memory profile (8 x vCPU & 32GB or memory)
- When configuring the Load Balancer for the AKS cluster, ensure it has at least 4 x IP addresses in the range (will require more as you expand out)
- Install Arc Data Services with a Load balancer
- Install SQL MI with a Load Balancer
- Create the AD Connector before creating the SQL MI
Azure Arc Data Controller
The key to being able to deploy Azure arc Data services is the Data Controller. Once the Data Controller is deployed onto the Aks cluster, then the data services, e.g. SQL MI, can be deployed.
Currently, only one Azure Arc data controller per Kubernetes cluster is supported. However, you can create multiple Arc data services, such as Arc-enabled SQL managed instances and Arc-enabled PostgreSQL servers, that are managed by the same Azure Arc data controller.
When you deploy Azure Arc data services, the Azure Arc Data Controller is one of the most critical components that is deployed. The functions of the data controller include:
- Provision, de-provision and update resources
- Orchestrate most of the activities for SQL Managed Instance enabled by Azure Arc such as upgrades, scale out etc.
- Capture the billing and usage information of each Arc SQL managed instance.
In order to perform above functions, the Data controller needs to store an inventory of all the current Arc SQL managed instances, billing, usage and the current state of all these SQL managed instances. All this data is stored in a database called controller within the SQL Server instance that is deployed into the controldb-0 pod.
Deployment of the Data Controller
1. Search for ‘Azure Arc Data Controllers’ in the Portal, select the Service and then click ‘Create’
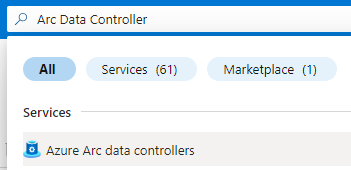 | 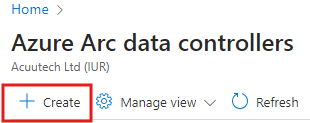 |
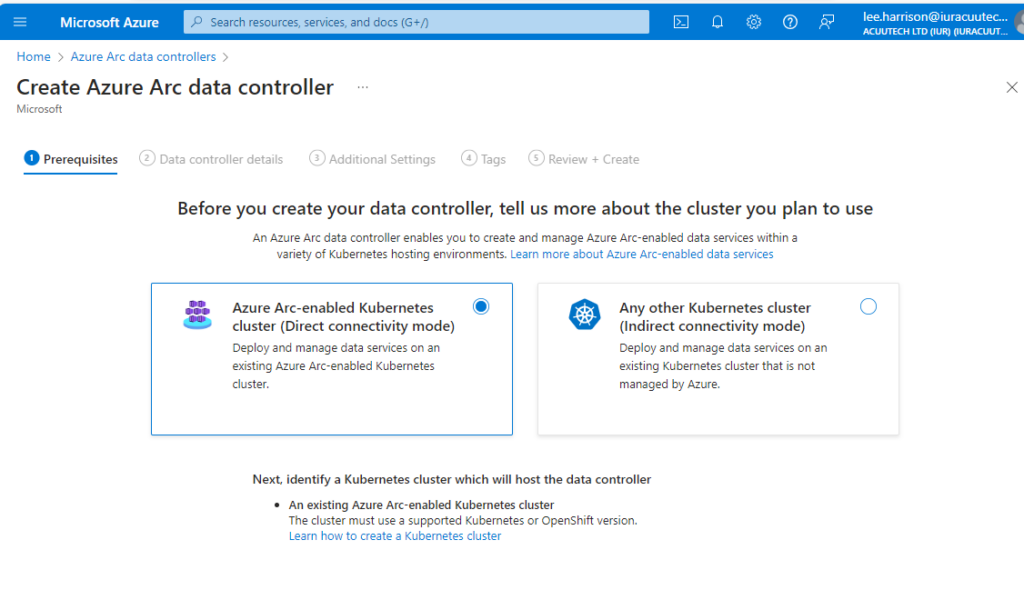
2. Select the connectivity mode (in our case, since we will be using and Aks cluster deployed to Azure Stack HCI, we will be using ‘direct connectivity mode’)
3. Under the details tab, enter the Subscription, Resource Group and Name for the data controller.
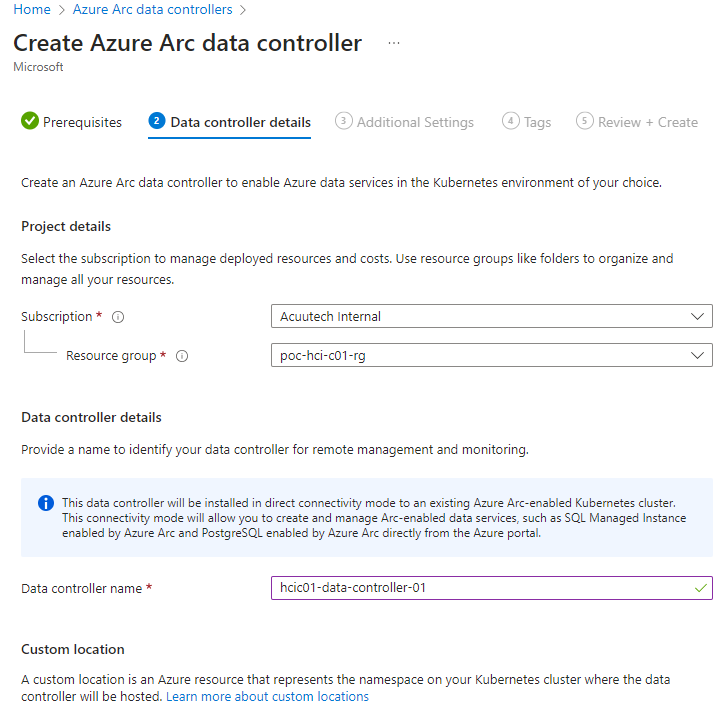
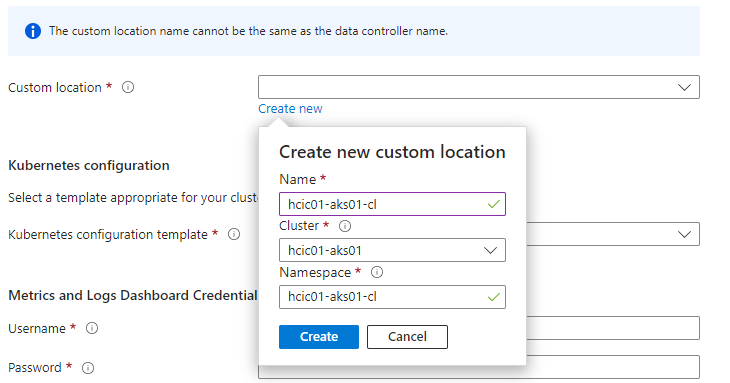
4. Also under the details tab, click ‘Create new custom location’ to create a custom location for the service. Enter a unique name and then select the target Aks cluster from the Cluster drop-down box. This custom location will become the target for which you depoy your data services to, e.g. SQL MI, and also become the k8s namespace under which the container services run.
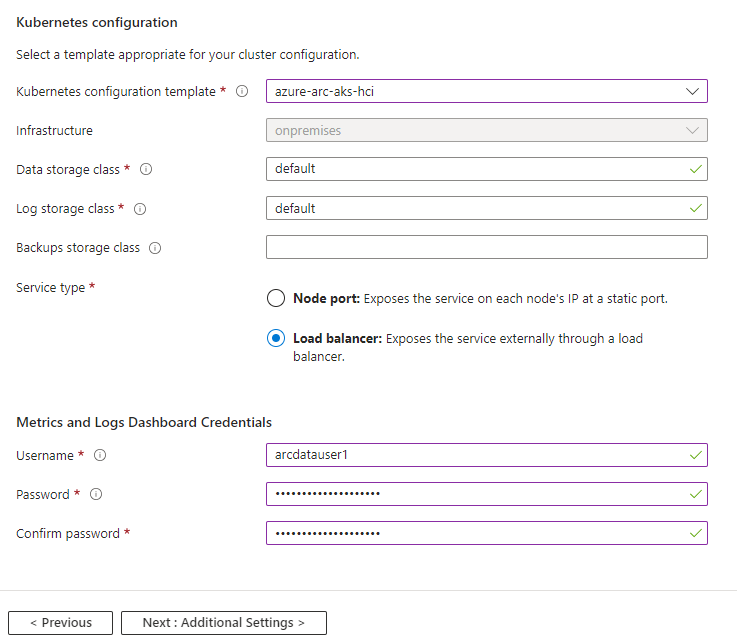
5. Still under the details tab, select the k8s configuration template, which defines the storage class. There are predefined templates and you can also configure a customer template. In this example we are using the predefined template designed for Azure Stack HCI.
6. Select ‘Load Balancer’ as the service type to utlise the Aks load balancer and expose services via the LB’s
7. Enter a username and password for the logs and metric dashboard.
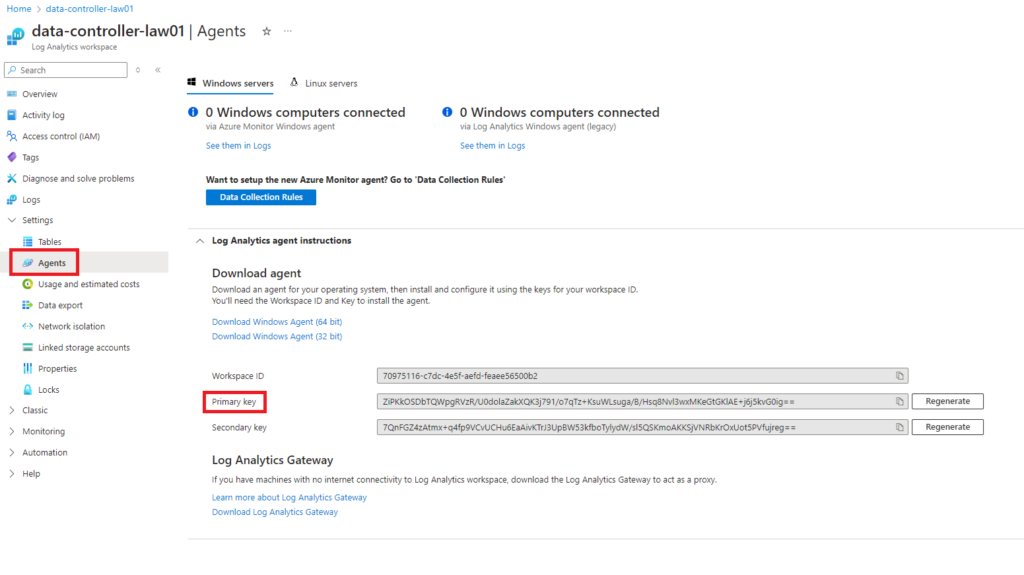
8. Configure the Azure Monitor settings and point to your Log Analytics Workspace
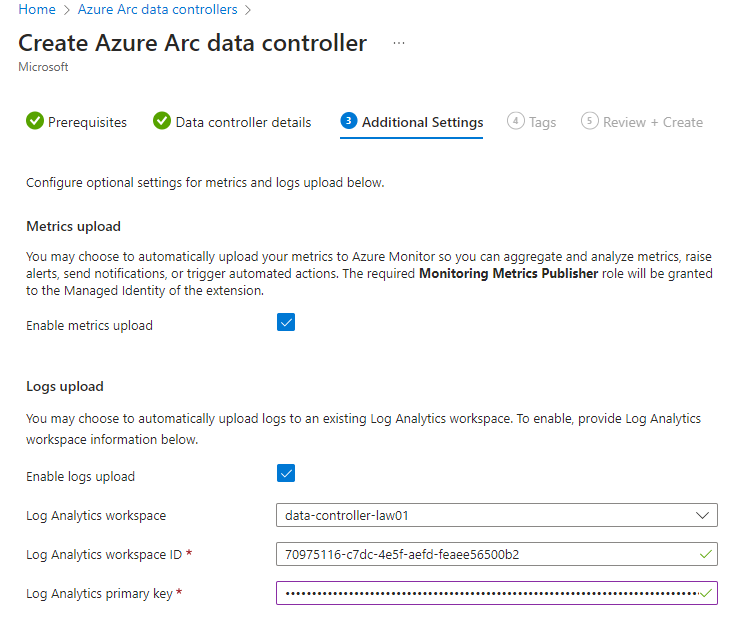
Note: the Log Analytics primary key can be found under the Agents section in the LAW
9. Confirm the details summary and click ‘Create’
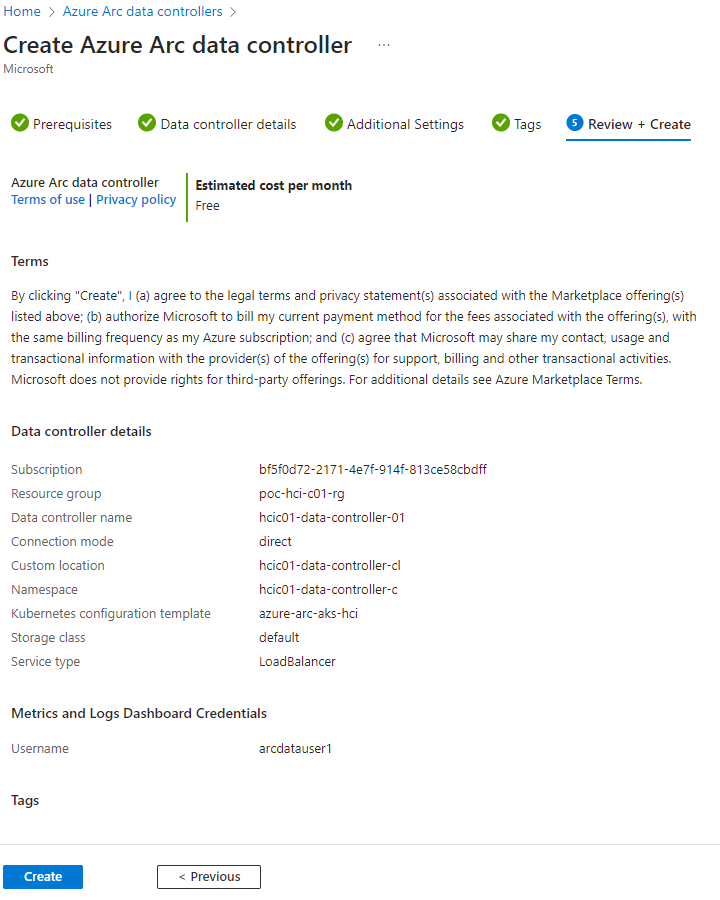
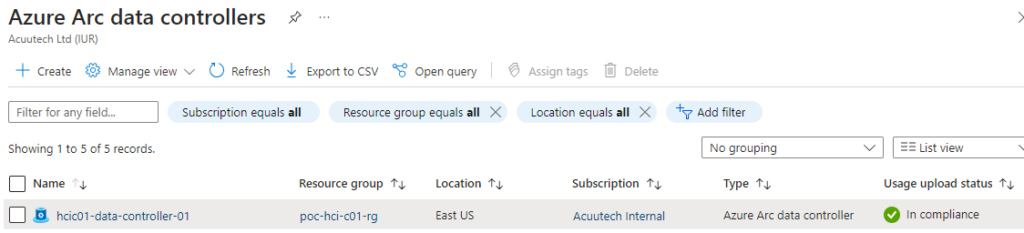
When deployment is complete, the Data Controller will be listed and status should be ‘In compliance’
AD Connector
SQL MI currently supports two authentication methods, SQL Authentication and Active Directory Authentication. When you deploy an instance with the intention to enable Active Directory authentication, the deployment needs to reference an Active Directory connector instance to use. Referencing the Active Directory connector in managed instance specification automatically sets up the needed environment in instance container to authenticate with Active Directory.
In order to enable Active Directory authentication to work, the instance must be deployed in an environment that allows it to communicate with the Active Directory domain.
For SQL MI with AD authentication, Azure Arc-enabled data services introduces a new Kubernetes-native Custom Resource Definition (CRD) called Active Directory Connector. It provides instances running on the same data controller the ability to perform Active Directory authentication.
To enable Active Directory authentication for SQL Server on Linux and Linux containers, use a keytab file. The keytab file is a cryptographic file containing service principal names (SPNs), account names and hostnames. SQL Server uses the keytab file for authenticating itself to the Active Directory (AD) domain and authenticating its clients using Active Directory (AD).
There are two Active Directory integration modes that use keytab files:
- Customer-managed keytab (CMK)
- Service-managed keytab (SMK)
Typically, business will use the Service-managed integration mode as it more automated in it’s management and creation. In this mode, a pre-created OU is required and a domain service account with permissions on the OU to create the required AD objects.
Prerequisites
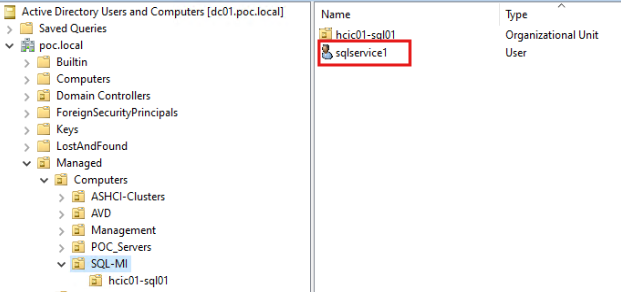
1. Add an Organizational unit:
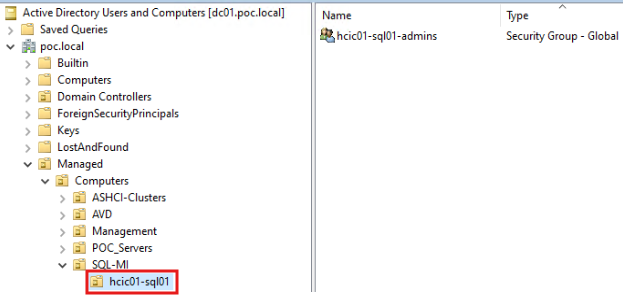
2. Create a domain service account with required permissions on the OU (system managed keytab):
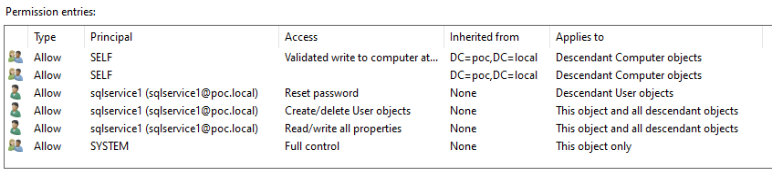
Permissions:
- Read all properties
- Write all properties
- Create User objects
- Delete User objects
- Reset password (descendant user objects)
Deploying an AD Connector
1. Go to your Data Controller resource and click ‘Add Connector’ under the ‘Active Directory section

2. Enter a name and select ‘Automatic’ and fill out the details including the OU’s distinguished name, name server IP addresses (i.e. your DNS servers), domain details and service account details you created in the previous steps.
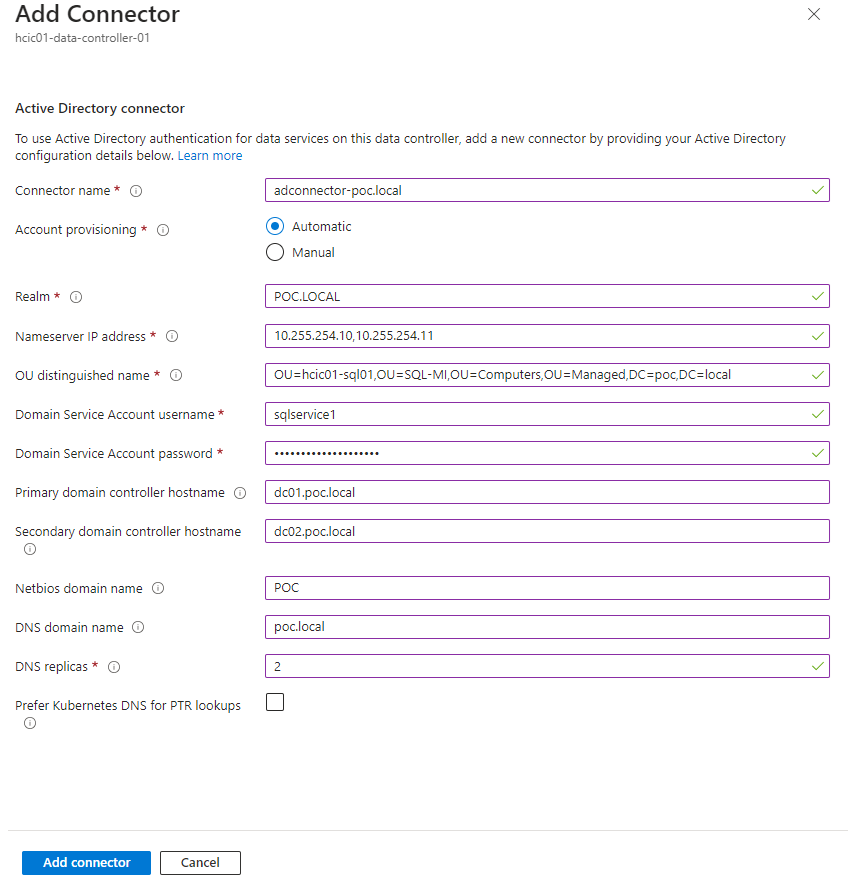
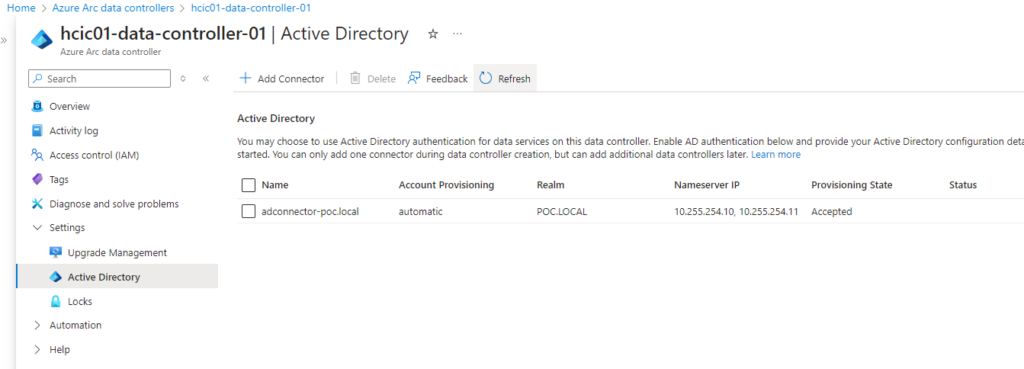
2. Click ‘Add connector’ and wait for the deployment to complete
SQL Managed Instance (MI)
Now we have an Aks Cluster, Arc Data Controller and AD Connector we are ready to deploy the SQL Managed Instance itself. The following steps will guide you on the deployment.
Deploy SQL MI
1. Search for ‘SQL managed instances – Azure Arc’ and click the ‘Create’ button
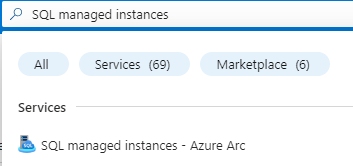 | 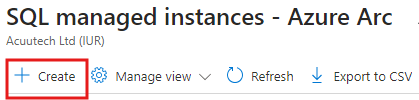 |
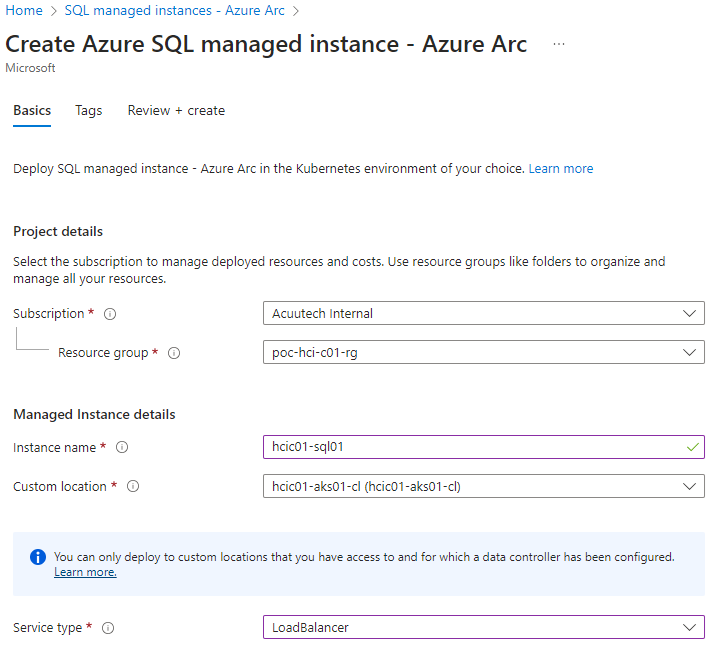
2. Select the subscription, resource group, enter an instance name, select the custom location and select the service type of ‘Load Balancer’. The custom location should be what you created when deploying the Data Controller a the previous step.
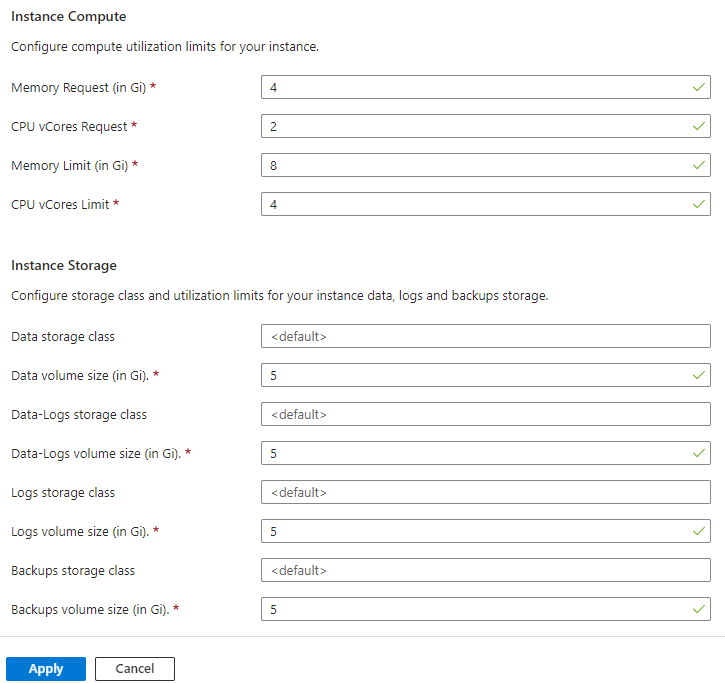
3. Select the Compute + Storage configuration options. It’s in these options that you select the service tier, license type, and high availability, compute and storage options. These options will determine the cost of the solution that will not be covered in this blog. For this example, I have selected the business critical service tier, which allows up to 3 replicas and I also set the readable and synchronized secondaries to 2. I left the instance compute and storage to the defaults. Finally click on Apply.
Note: If deploying this in a lab, dev or test environment tick ‘For development use only’ to not incur any costs.

4. Enter the directory services account username and password. This is the account setup in step 2 of the prerequisites in the previous section.
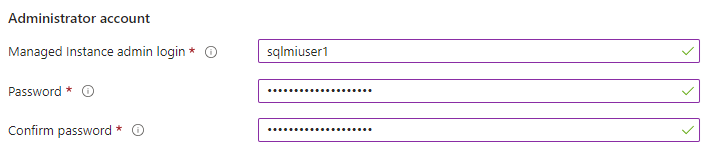
5. Configure the Active Directory settings by selecting the AD Connector name that was deployed earlier, adding an AD account name and Primary and Secondary DNS names. The Ad account will be created automatically and we’ll need to manually add DNS records for the DNS names after the deployment completes. Finally click ‘Review + create’.

6. Review the summary and click on ‘Create’ to begin the deployment.

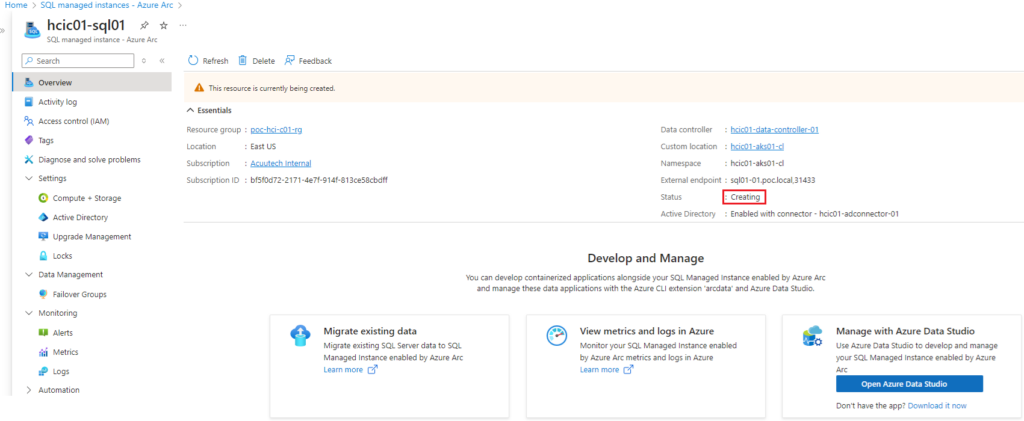
Monitoring the deployment
Whilst the deployment is in progress the Status will show are “Creating”.
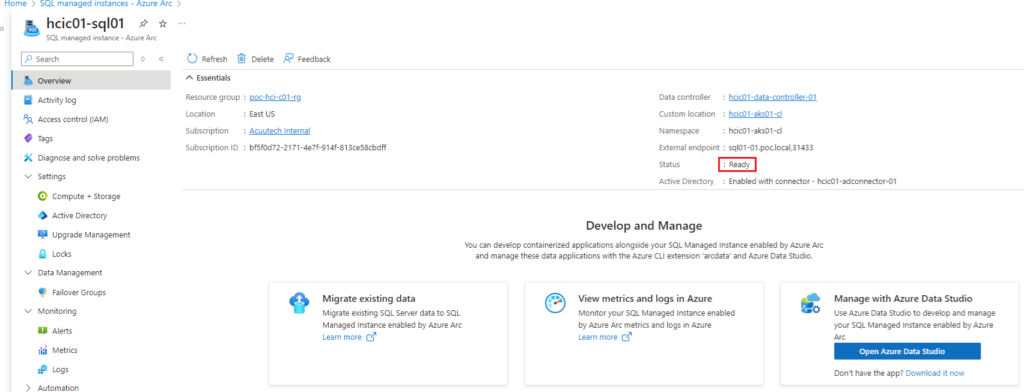
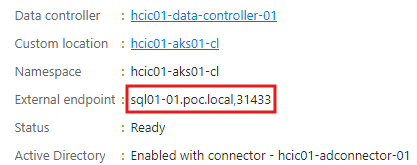
Once deployment is completed, the status will show as “Ready”.
Configuring DNS Names
In the above example, we created 2 x DNS names that are used as external endpoints to access the SQL instance. For these endpoints to work, we need to manually add DNS A records.
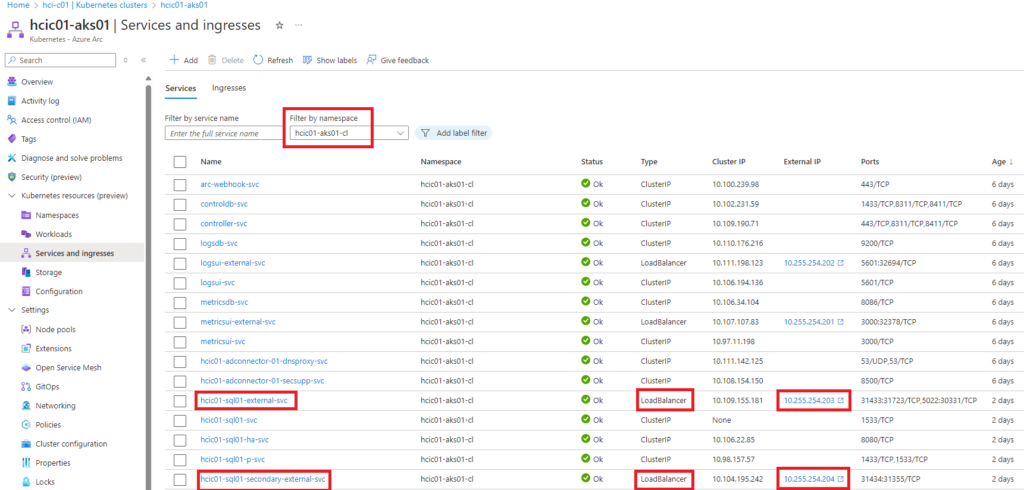
The IP addresses used for the DNS A records are in fact the IP addresses that get assigned to the Load Balancer services in the Aks cluster. To identify those IP addresses, you can look them up in the Aks cluster details in the Portal, or via kubectl commands on the command line.
Retrieving IP Addresses
To see the load balancer IP addresses in the Azure portal, navigate to your Aks cluster under the HCI cluster and under ‘Service and ingresses’ select the namespace under the filter drop-down. The namespace is the custom location name created when deploying the Data Controller in a previous step.
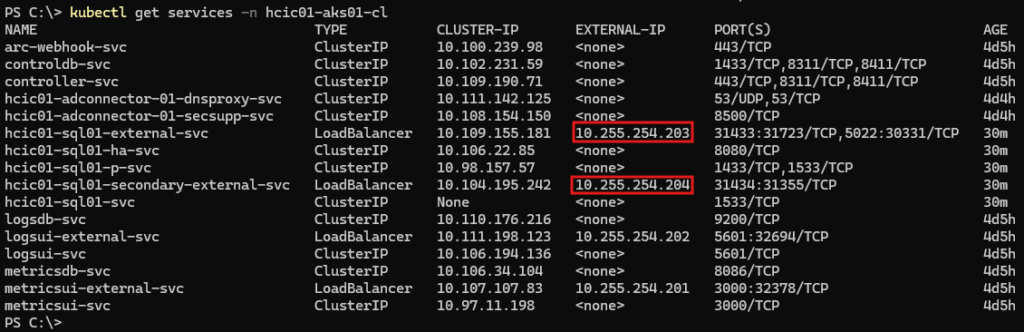
Add DNS A records for the primary and secondary DNS names as created when deploying the SQL MI in the previous step.

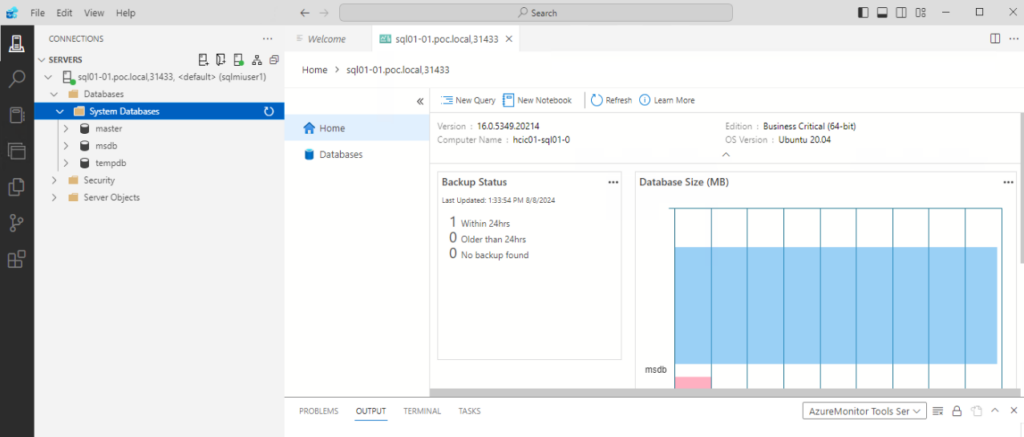
Connecting to the SQL MI
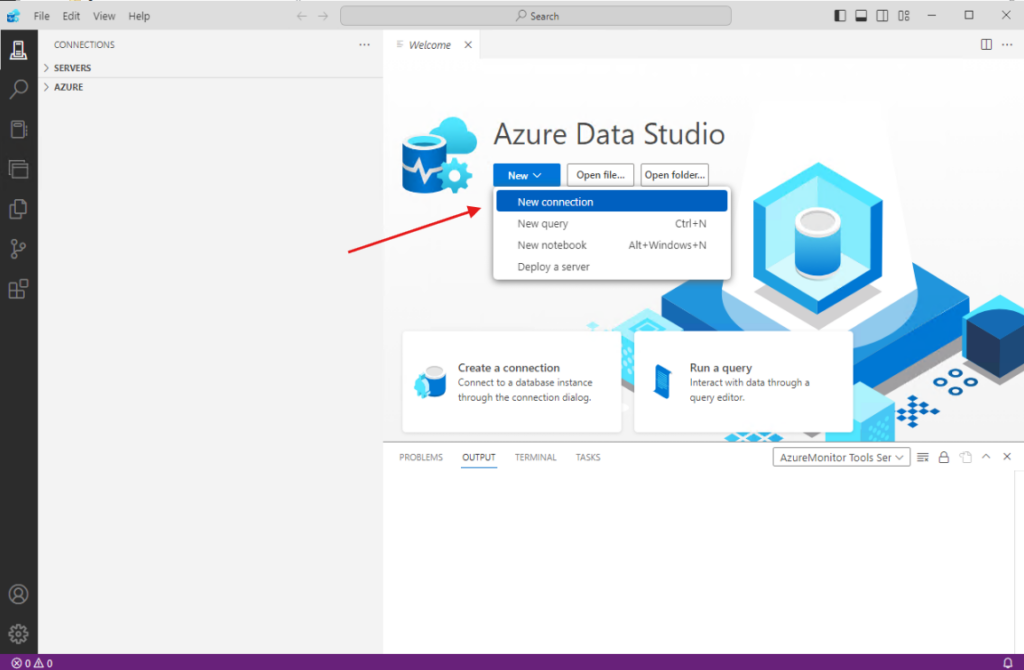
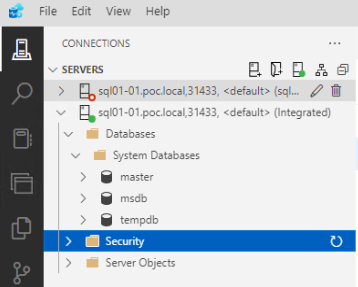
In this example I am using Azure Data Studio to connect to the SQL MI deployed previously. Azure Data Studio is installed onto a local management server in the environment that has network access to the external endpoints.
First open Azure Data Studio and then select ‘New Connection’ and fill out the connection details. The server details is the primary external endpoint that you can see in the SQL MI. For the first time to login, you will need to use a SQL Login, and the credentials are that of the domain service account created in a previous step.
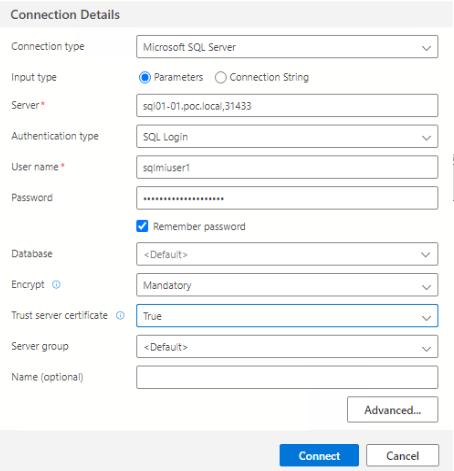
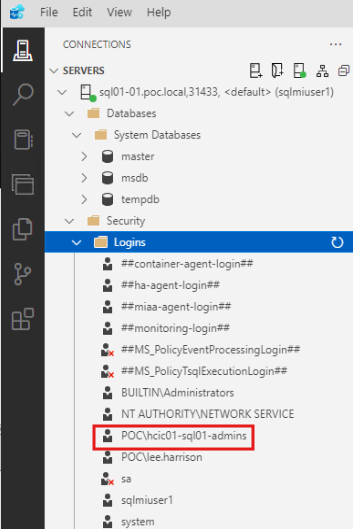
After you have logged in with the SQL login, you can add a AD groups or users for Windows Authentication.
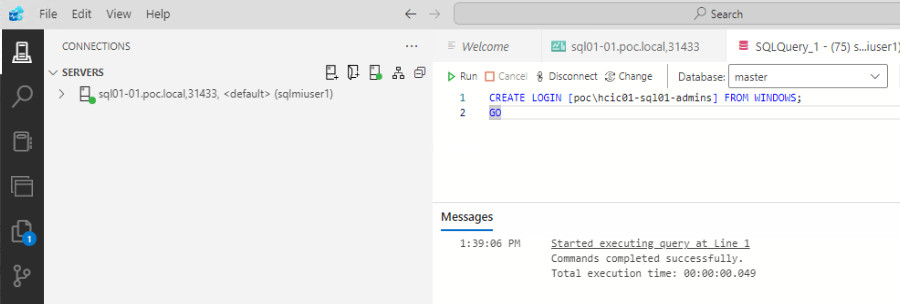
Note: if adding a group then you will need to log out and back into the server you are running Azure Data Studio from to update you account’s group context.
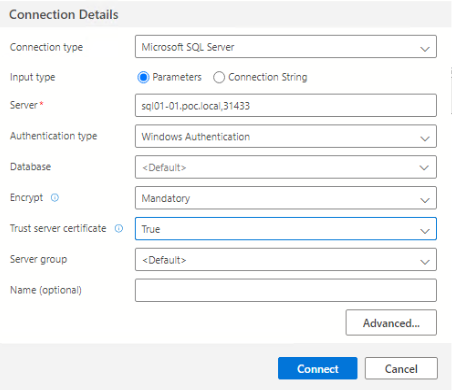
Open a new connection and this time select ‘Windows Authentication’
Conclusion
SQL MI’s are a wonderful technology leveraging the power of Kubernetes and I hoped you found this blog useful in helping you start your SQL MI journey. There is a lot more to be covered such as costs, sizing, performance, DR and I will hopefully cover these in future blogs.
As ever, please refer to the Microsoft documentation for further information and below are links to some of the articles I referenced in this blog:
https://learn.microsoft.com/en-us/azure/azure-arc/data
https://learn.microsoft.com/en-us/azure/azure-arc/data/managed-instance-overview