What is Bitlocker?
BitLocker is a full-disk encryption feature available in Microsoft Operating Systems that helps protect data by encrypting entire drives or Volumes, addressing the threats of data theft or exposure from lost, stolen, or inappropriately decommissioned devices. It relies on Trusted Platform Module (TPM) hardware for secure key storage.
For Azure Local Instances, BitLocker can be used to encrypt the data storage and OS drives in Azure Local Instances. Enabling volume encryption with BitLocker on volume type BootVolume requires TPM 2.0.
Key Features for Azure Local:
- Enhanced Security: Encrypts data at rest on storage drives.
- Compliance: Helps meet regulatory requirements for data protection.
- Resilient Infrastructure: Supports failover clustering with encrypted disks.
How to use Bitlocker in Azure Local Clusters
BitLocker is supported on Azure Local cluster, version 23H2 or newer, when registered and connected to Azure.
BitLocker offers two types of protection: encryption for OS volumes and encryption for data volumes.
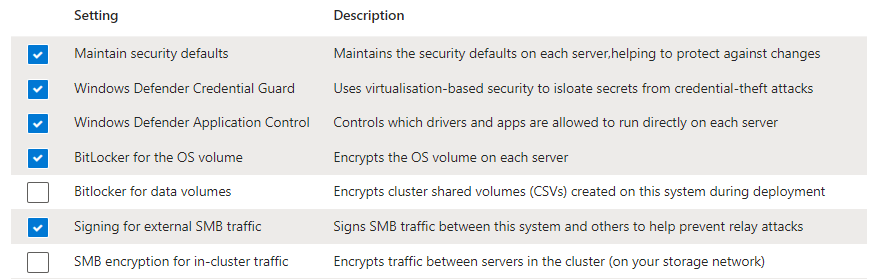
The default recommend security options for to cloud deployment will use BitLocker to will encrypt the OS and Data volumes. These options can be changed, if needed. For example, the below options will encrypt the OS drive but not the data volumes:
BitLocker can be enabled post Instance deployment where the default security options were not selected. There are dedicate commands for BitLocker,as per below, which include the syntax to enable at the per node or cluster scope:
Enable-ASBitLocker -<Local | Cluster> -VolumeType <BootVolume | ClusterSharedVolume>
*Please note: While enabling volume encryption with BitLocker on volume type ClusterSharedVolume (CSV), the volume will be put in redirected mode and any workload VMs will be paused for a short time. This operation is disruptive; plan accordingly.
To disable BitLocker you can use the following syntax:
Disable-ASBitLocker -<Local | Cluster> -VolumeType <BootVolume | ClusterSharedVolume>
You can view the status of BitLocker using these commands:
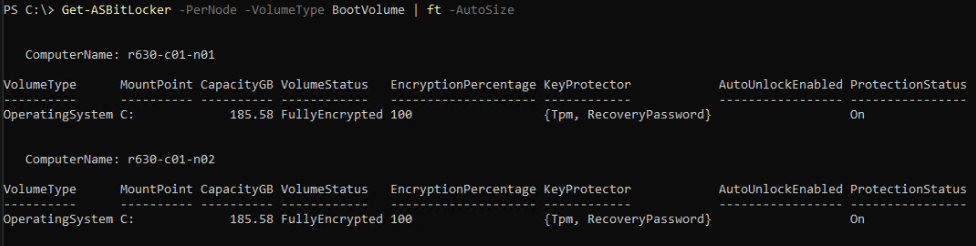
Get-ASBitLocker -<Local | PerNode> -VolumeType BootVolume
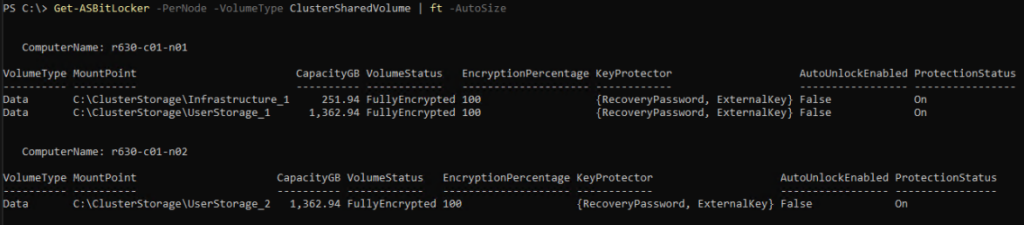
Get-ASBitLocker -<Local | PerNode> -VolumeType ClusterSharedVolume
Examples:
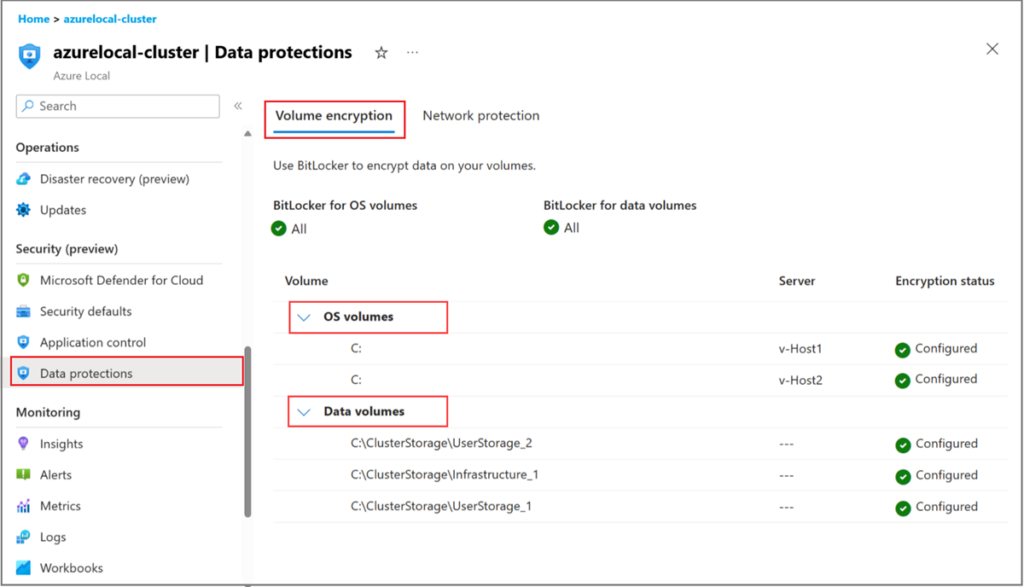
BitLocker in the Azure Portal
To view the BitLocker settings in the Azure portal, make sure that you have applied the MCSB initiative. For more information, see Apply Microsoft Cloud Security Benchmark initiative.
The BitLocker configuration can be viewed in the ‘Data protections’ pane under the ‘Security’ section of the ‘cluster ‘Azure Local’ resource.
Retrieving Keys
BitLocker keys can be retrieved directly from the nodes, or from your local Active Directory. It is recommend to backup/save your BitLocker recovery keys after a new instance is deployed, and store them in a secure external location such as Azure Key Vault.
The below commands and be used to retrieve the keys directly from a node:
Get-AsRecoveryKeyInfo | ft ComputerName, PasswordID, RecoveryKey

Get-ASBitLocker -VolumeType BootVolume

Get-ASBitLocker -VolumeType ClusterSharedVolume | ft -AutoSize
To retrieve keys for OS boot from Active Directory:
$computer = Get-ADComputer <<comoutername>>
Get-ADObject -Filter 'objectClass -eq "msFVE-RecoveryInformation"' -SearchBase $computer.DistinguishedName -Properties whenCreated,msFVE-RecoveryPassword | `
Sort whenCreated-Descending | Select whenCreated,msFVE-RecoveryPassword
Sometimes you’ll need the BitLocker keys to reboot nodes. This typically doesn’t happen for normal reboots, but can be required when BIOS and firmware updates are applied. Also, if hardware components such as the motherboard are replaced then it would also require the BitLocker key to be entered when rebooting the node. Having these keys stored separately can save you a lot of time and trouble.
Conclusion
I hope the above helps to explain how BitLocker is used on Azure Local instances.
Links:
Please refer the Microsoft documentation for further information:
Manage BitLocker encryption on Azure Local, version 23H2 – Azure Local | Microsoft Learn